
Inattentively scribbling on a pad of paper while barely surviving through a boring lecture. If that sounds like you, why not try getting better at scribbling? Perhaps, you could try pencil sketching and unshackle the hidden crackerjack stuck inside of you. Sometime you might wonder, those random scribbles look fantastic, but when you consciously try to draw something, you end up making a mess! If that’s your mare’s nest, you are at the right place. Here are a few tidbits you could use to start sketching as a rookie:
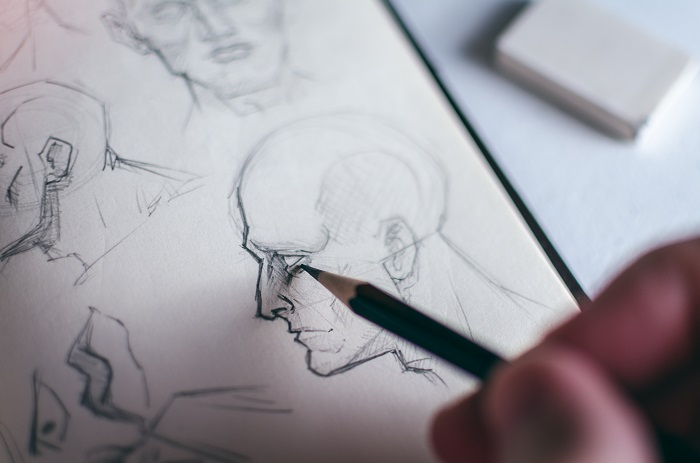
(1). Start with outlines
While drawing anything, the first thing you draw is outlines, faint ones, visible just enough to give you something to work on. You might want to use a harder pencil (6B) to create faint lines. Once done, you shall go over it again for the second time, drawing visible, sharp secondary outlines, and defining the contours of the object you are trying to sketch. As you work your way out, you will end up with something like this:
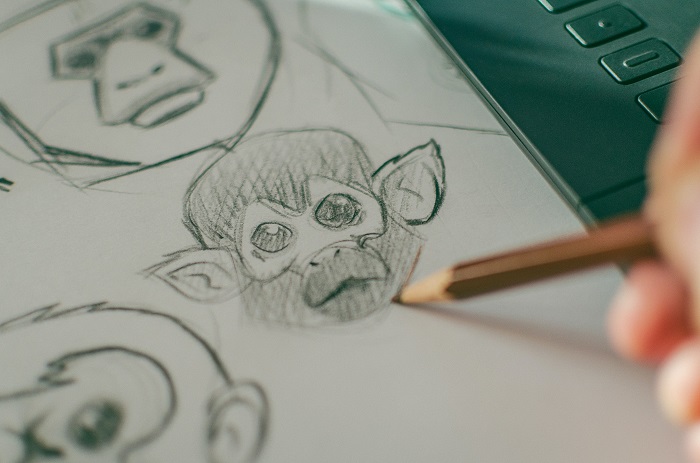
(2). Hatching & Crosshatching
Now that you have a skeleton to work on, you might wonder how these skeletons look lively? That’s where shading kicks in. Hatching is a technique where you draw multiple miniature unidirectional lines closely, creating a shading effect that defines your object. On the contrary to hatching, which is unidirectional, crosshatching is a technique when you first start with hatching, followed by drawing lines crossing it over in the opposite direction, creating a shape similar to “X.” As you can see in the monkey’s head:
(3). Circular Scribbles
It’s just another type of shading, where you move your pencil in a swirling motion creating rough curls, usually used to create hairs, shade trees, etc. For this, you draw curved lines coiled inwards at one end, creating an illusion of hair, animal fur, or maybe tree leaves. For a better idea, have a peek at the swirls formed by the smoke:

(4). Good old shading
Probably the most basic yet intricate and the first thing that comes to your mind when thinking of pencil sketches! For this, you might want to start with a thick pencil (6B) and shade your way around, depicting the shadows. However, as you progress further toward the center, you might want to start fading your shades using a lighter pencil (2B). Doing so will ensure you will have a smooth transition. Once done, you might want to use your finger or tissue paper to blend and smoothen the graphite left behind.

It’s noteworthy to mention that practice makes things perfect! Don’t worry if you can’t get the sketching right in your first shot. Work your way slowly and get the hang of it.


